


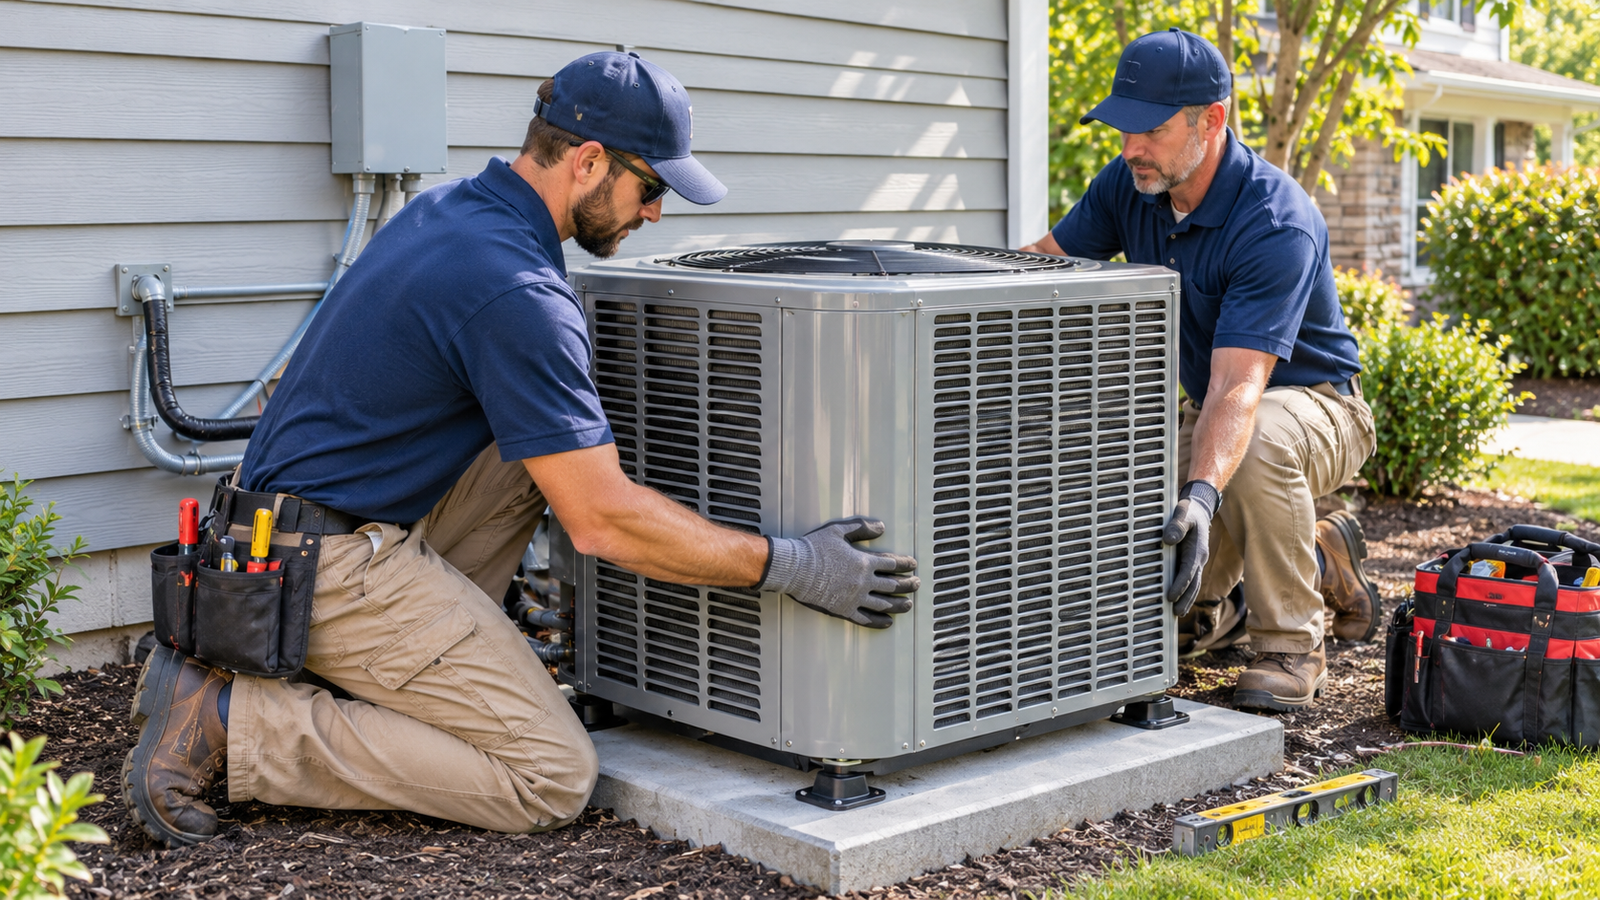
Heat Pump Installation: Step-by-Step Guide, Timeline and Costs
A properly installed heat pump can provide both heating and cooling for years, but the equipment itself is only part of the equation. The installation process determines whether the system is correctly sized, moves enough air, operates efficiently, and keeps your home comfortable in both summer and winter.
A typical residential heat pump installation involves a home assessment, heating and cooling load calculations, equipment selection, permit checks, installation, electrical and refrigerant work, and final system testing. A straightforward replacement may take about a day, while projects involving new ductwork, electrical upgrades, or major changes to the home can take several days or longer.
If you’re planning a heat pump installation, understanding each stage will help you compare contractor proposals, recognize a complete installation, and avoid paying for equipment that isn’t right for your home.
1. What Happens Before a Heat Pump Is Installed?
The installation process should begin with an assessment of your home, not a quick measurement of its square footage. A contractor needs to understand how much heating and cooling the building requires, how air moves through it, and whether the existing electrical and duct systems can support the proposed equipment.
This assessment usually includes the home’s floor area, insulation, windows, air leakage, ceiling height, orientation, and local design temperatures. The contractor should also inspect the existing heating and cooling equipment, thermostat, electrical panel, and accessible ductwork.
For an existing home, this is a useful time to discuss comfort problems. A bedroom that stays cold, a second floor that overheats, or a room with weak airflow may point to issues that should be addressed before the new system is selected.
Why Does a Contractor Need a Manual J Calculation?
Manual J is the residential heating and cooling load calculation procedure published by the Air Conditioning Contractors of America (ACCA). It estimates how much heating and cooling each room and the entire home require under specified outdoor and indoor conditions.
The calculation considers factors such as insulation, windows, air leakage, building orientation, and local climate. It gives the contractor a more reliable basis for equipment selection than a general rule such as one ton of cooling for a fixed number of square feet.
That distinction matters because two houses with the same floor area can have very different heating loads. A well-insulated home with modern windows may need less capacity than an older house with significant air leakage and limited insulation.
Ask the contractor whether the proposal includes a documented load calculation. If the only sizing method is a quick look at the old equipment or the home’s square footage, request a more complete assessment.
How Is the Correct Heat Pump Selected?
After calculating the home’s heating and cooling loads, the contractor should select equipment that can meet those loads under the relevant operating conditions. ACCA Manual S provides a framework for residential equipment selection using the load calculation, local climate, and manufacturer performance data.
Nominal capacity alone does not tell the whole story. A heat pump’s heating output can change as outdoor temperatures fall, and different models maintain different levels of capacity in cold weather. The contractor should review the manufacturer’s performance data at relevant outdoor temperatures rather than relying only on the model’s advertised tonnage.
If the home has ducts, the duct system also needs attention. Manual D covers residential duct design. Existing ducts may need sealing, resizing, balancing, or other improvements to deliver the airflow required by the new equipment.
ENERGY STAR recommends proper sizing, optimized airflow, correct refrigerant charge, and duct evaluation as parts of quality HVAC installation. These details can affect comfort, energy use, and equipment life.
2. What Type of Heat Pump Installation Does Your Home Need?
The next decision is the system configuration. The right option depends on the home’s existing heating and cooling equipment, ductwork, layout, climate, and the number of rooms that need conditioning.
There are three common residential approaches: a ducted central heat pump, a ductless mini-split system, and a dual-fuel system that combines a heat pump with a furnace. Each has different installation requirements.
| System type | Typical application | Important installation considerations |
|---|---|---|
| Ducted heat pump | Homes with existing central ductwork | Duct condition, airflow, indoor coil compatibility, and system sizing |
| Ductless mini-split | Homes without suitable ducts, additions, or room-by-room zoning | Indoor unit placement, refrigerant line routing, condensate drainage, and outdoor unit location |
| Dual-fuel system | Homes combining an electric heat pump with a gas or propane furnace | Equipment compatibility, control strategy, changeover settings, and local fuel costs |
A ducted system can be a practical replacement for an existing central air conditioner and furnace when the ductwork is suitable. However, existing ducts should not automatically be assumed to be correctly sized or airtight.
A ductless mini-split can avoid the need for a new central duct network. It does require careful planning for indoor unit locations, refrigerant piping, condensate drainage, electrical supply, and outdoor equipment placement.
A dual-fuel configuration can use the heat pump for much of the heating season and a furnace under selected conditions. The changeover strategy should be based on equipment performance, climate, energy prices, and the homeowner’s preferences.
Pro Tip: Ask the contractor to explain why the proposed system type fits your home. A lower initial quote may leave out duct improvements, electrical work, or additional indoor units that are necessary for the system to perform as expected.
3. Do You Need Permits or Electrical Upgrades for a Heat Pump?
Permit requirements vary by state, county, and municipality. A heat pump replacement may require a mechanical permit, an electrical permit, or both. New installations and projects involving structural changes can trigger additional requirements.
Before signing a contract, ask which permits apply to your project and who will obtain them. The contractor should be familiar with the requirements of the local authority having jurisdiction (AHJ). Do not assume that a permit is unnecessary simply because an older system is being replaced.
Electrical capacity is another point to check early. Some heat pump installations can use the existing electrical service, while others may require a new circuit, wiring changes, or an electrical panel upgrade. The answer depends on the equipment’s electrical requirements and the capacity of the home’s existing service.
Ask for the proposed equipment’s electrical specifications and have a qualified electrician assess any necessary changes. The proposal should identify electrical work separately so you can understand what is included in the price.
Outdoor unit placement also needs planning. The location should follow manufacturer clearance requirements and allow access for service. The contractor should consider drainage, snow accumulation, landscaping, noise, and the route for refrigerant lines and electrical connections.
For ductless systems, indoor unit locations should be selected with room layout and air distribution in mind. A wall-mounted unit placed where furniture or architectural features block airflow may not provide the comfort you expect.
4. What Happens During the Actual Heat Pump Installation?
Once the design, equipment, permits, and installation plan are ready, the crew can begin the physical work. The exact sequence varies by system type and by whether the project is a replacement or a new installation.
For a typical residential project, the main stages include removing old equipment when necessary, preparing the installation locations, setting the outdoor and indoor units, connecting the distribution system, completing electrical and refrigerant work, and testing the finished installation.
Here is what homeowners can generally expect during the process:
- Protecting the work area: The crew prepares access routes and protects nearby surfaces before removing or moving equipment.
- Removing existing equipment: If this is a replacement, the old outdoor unit, indoor coil, air handler, or other components are removed as required. Refrigerant recovery must be handled by appropriately certified personnel.
- Preparing equipment locations: The contractor checks the outdoor pad or mounting arrangement, indoor equipment space, service clearances, and routing for piping, wiring, and condensate drainage.
- Installing indoor and outdoor units: The equipment is positioned and secured according to the manufacturer’s installation instructions.
- Connecting the system: Qualified technicians complete refrigerant piping, electrical connections, controls, condensate drainage, and duct connections where applicable.
- Testing and commissioning: The contractor checks system operation, airflow, refrigerant charge, controls, and other measurements appropriate to the equipment.
- Explaining system operation: The homeowner receives instructions for thermostat use, filter access, maintenance, and warranty documentation.
The most important work may be difficult to see after the crew leaves. Refrigerant piping, electrical connections, airflow adjustments, and commissioning measurements have a direct effect on system operation even though they are hidden behind panels or inside the equipment.
Homeowners should not attempt refrigerant handling, high-voltage electrical work, or internal system testing themselves. These tasks require qualified professionals, appropriate tools, and compliance with applicable regulations.
5. How Long Does Heat Pump Installation Take?
There is no single installation timeline that applies to every home. A straightforward replacement using compatible existing ductwork and electrical service can often be completed in about one working day. A new system with duct modifications, electrical upgrades, multiple indoor units, or difficult access can take several days or require separate visits.
The calendar time can also be longer than the time spent on site. Equipment availability, permit approval, inspections, weather, and scheduling may affect the period between signing the contract and having a fully operational system.
What Can Make the Installation Take Longer?
Several factors can add time to a heat pump project:
- New ductwork: Installing or redesigning ducts requires additional labor and coordination.
- Electrical upgrades: A new circuit or panel work may require an electrician and additional inspection.
- Multiple mini-split zones: Each indoor unit adds installation, piping, drainage, and control work.
- Access problems: Tight crawlspaces, finished ceilings, limited outdoor access, or long piping routes can complicate the job.
- Permit and inspection scheduling: Local approval and inspection availability can affect the overall project schedule.
Ask the contractor for two timelines: the estimated number of working days on site and the expected calendar time from contract approval to final inspection. This makes it easier to plan around heating or cooling interruptions.
6. How Much Does Heat Pump Installation Cost?
Heat pump installation costs depend on the system type, equipment capacity, home layout, local labor rates, electrical requirements, ductwork, and the amount of work needed to prepare the property. Two homes in the same neighborhood can receive very different quotes if one is a simple equipment replacement and the other needs extensive modifications.
As a recent market reference, EnergySage reported a national average installation price of approximately $15,393 before incentives in its March 2026 analysis of real-world marketplace quotes. Its reported averages varied substantially by system type and location. These figures are useful for initial budgeting, but they are not a guaranteed price or a substitute for local quotes.
For example, the same analysis reported average prices of about $14,529 for ducted heat pumps and $25,957 for ductless systems before incentives. The difference reflects the range of equipment configurations and project requirements represented in its marketplace data.
Location can have a major effect as well. Labor costs, climate requirements, local building conditions, and the mix of systems installed in a region all influence the prices homeowners receive.
What Should Be Included in a Heat Pump Installation Quote?
A useful quote should describe the full scope of work rather than list only the outdoor unit and an installation total. Review the following items before comparing offers:
- Outdoor and indoor equipment models, capacities, and efficiency ratings.
- Manual J load calculation and the basis for equipment selection.
- Thermostat, controls, and any auxiliary or backup heating equipment.
- Duct inspection, sealing, repairs, modifications, and airflow balancing.
- Electrical circuits, wiring, disconnects, and any panel work.
- Refrigerant piping, condensate drainage, mounting, and outdoor unit preparation.
- Permit fees, inspections, startup testing, and commissioning.
- Labor warranty, manufacturer warranty, and post-installation support.
Make sure the quote identifies exclusions. For example, an offer may not include electrical panel upgrades, duct repairs, asbestos-related work, structural changes, or restoration of finished walls. Those items can materially change the final cost.
Get at least two or three detailed proposals when practical. Compare the equipment models and scope of work line by line. A lower price may reflect a smaller scope, a different system configuration, or work that has been left for the homeowner to arrange separately.
7. How Do You Choose the Right Heat Pump Installer?
The contractor has a major influence on the final result. A well-designed heat pump can still perform poorly if it is incorrectly sized, connected to unsuitable ductwork, or started up without proper testing.
Check whether the contractor is licensed where required, carries appropriate insurance, and has experience with the type of heat pump you are considering. Ask for references from comparable residential projects rather than relying only on general HVAC experience.
Before accepting a proposal, ask these questions:
- Will you perform a room-by-room Manual J load calculation?
- How will you select the equipment using the calculated loads and manufacturer performance data?
- Will you inspect the existing ductwork and verify airflow requirements?
- Which permits and inspections are required, and who is responsible for arranging them?
- What startup and commissioning tests will you perform, and will I receive the results?
- What is covered by the labor warranty, and what is covered by the manufacturer’s warranty?
A good contractor should be able to explain the design and installation decisions in language you can understand. If a salesperson cannot explain why a particular system size or configuration was selected, ask to speak with the person responsible for the technical design.
8. What Should Be Checked Before the Installer Leaves?
Installation is not complete simply because the outdoor unit starts running. The contractor should verify that the system operates according to the equipment specifications and that the controls, airflow, and distribution system work as intended.
Commissioning is the process of checking that the system has been designed, installed, and tested properly. Depending on the system, the contractor may need to verify refrigerant charge, electrical operation, airflow, static pressure, duct leakage, controls, and overall performance.
The Pacific Northwest National Laboratory’s Building America Solution Center describes commissioning procedures for residential heat pumps, including pressure testing, vacuum decay testing, refrigerant charge verification, and controls checks. Additional airflow and duct tests apply where ducted distribution is used. These procedures are for trained and qualified technicians.
Before the crew leaves, ask for the following:
- Model and serial numbers for installed equipment.
- Permit and inspection documentation, where applicable.
- Commissioning or startup report with relevant measurements.
- Thermostat instructions and recommended operating settings.
- Filter location, replacement size, and maintenance guidance.
- Manufacturer warranty registration details and contractor labor warranty.
- Contact information for service and warranty support.
Have the installer show you how to switch operating modes, adjust the thermostat, and identify the filter. You should also know what normal system sounds and operating behavior look like, especially during cold-weather operation and defrost cycles.
If the system has multiple zones, ask how each zone is controlled and whether all indoor units have been tested. For a ducted system, ask whether airflow was checked against the equipment requirements.
9. Common Heat Pump Installation Mistakes to Avoid
Many installation problems begin before the equipment reaches the property. The following warning signs are worth addressing while you are still comparing contractors and reviewing the project scope.
- Choosing equipment by square footage alone: A rough estimate cannot replace a proper heating and cooling load calculation.
- Ignoring existing ductwork: Leaks, restrictions, and poor balancing can prevent the system from delivering the expected airflow.
- Comparing only equipment brands: Equipment quality matters, but correct sizing, system matching, and installation procedures matter too.
- Skipping commissioning: Without appropriate testing, installation problems may remain undetected until comfort or performance suffers.
- Leaving permits unclear: Unresolved permit responsibilities can create delays and problems during inspection or resale.
- Accepting vague warranty terms: Manufacturer parts coverage and contractor labor coverage are different. Get both in writing.
One detail deserves particular attention: replacing an old system with a unit of the same nominal capacity does not automatically make the new installation correct. Changes to insulation, windows, air sealing, or room use may have changed the home’s heating and cooling requirements since the original system was installed.
Frequently Asked Questions
How long does it take to install a heat pump?
A straightforward replacement may take about one working day. Projects involving new ductwork, electrical upgrades, multiple mini-split zones, or difficult access can take several days or longer.
Do I need to replace my ductwork when installing a heat pump?
Not necessarily. Existing ducts may be suitable if they are properly sized, sealed, and capable of delivering the required airflow. A contractor should inspect the duct system and recommend repairs or modifications when needed.
Can a heat pump use my existing electrical panel?
Some installations can use the existing electrical service, while others need a new circuit or additional electrical work. A qualified electrician should assess the panel capacity and the electrical requirements of the selected equipment before installation.
Does a heat pump installation require a permit?
Permit requirements depend on local building and electrical rules. Your contractor should check with the local authority having jurisdiction and explain which permits and inspections apply to the project.
How much should I budget for a heat pump installation?
Costs vary by system type, location, equipment capacity, and project scope. EnergySage reported an average installation price of approximately $15,393 before incentives in its March 2026 marketplace analysis, but local written quotes are necessary for a realistic estimate.
The best way to approach a heat pump installation is to evaluate the design and scope before comparing the final price. Ask for a documented load calculation, equipment selection details, a clear permit plan, and commissioning results. Those items give you a much better basis for judging whether the proposed system is appropriate for your home.
Important: Costs and Installation Timelines Vary
The costs and timelines discussed in this guide are general estimates, not guaranteed prices or schedules. Your actual installation cost and project duration will depend on several factors, including your location, local labor rates, equipment type and capacity, existing ductwork, electrical system, permit requirements, and any additional work needed at your home.
Two homes with similar square footage may require very different installation budgets and timelines. Before making a decision, request a written estimate from a qualified HVAC contractor. Make sure it specifies the equipment model, scope of work, labor, permits, electrical upgrades, included materials, and any potential additional charges.
Use the figures in this article as a starting point for planning, then compare them with quotes from licensed contractors in your area.